
Capture & PM selection
During the product review process for photography, each Product Manager and Brand
Manager provides feedback following the process below. For every SKU these tasks
live in the subitems on the Product Planning (NPI) board.
This page covers the two photography subitems: photography_originals and
photography_versions. All review happens in
Iconik.
Stage 1 - photography_originals (PM angle selection)
Section titled “Stage 1 - photography_originals (PM angle selection)”photography_originals are the RAW images produced by AMC/USA or an outside vendor.
These images are flat and unedited and are not to be judged for cosmetic
flaws at this stage. Once photography is completed, an Iconik review link is pushed
to Monday and the task enters PM review by itself (PM Review) - no one has to
announce “ready for review.”
What the Product Manager does in Iconik at this stage:
-
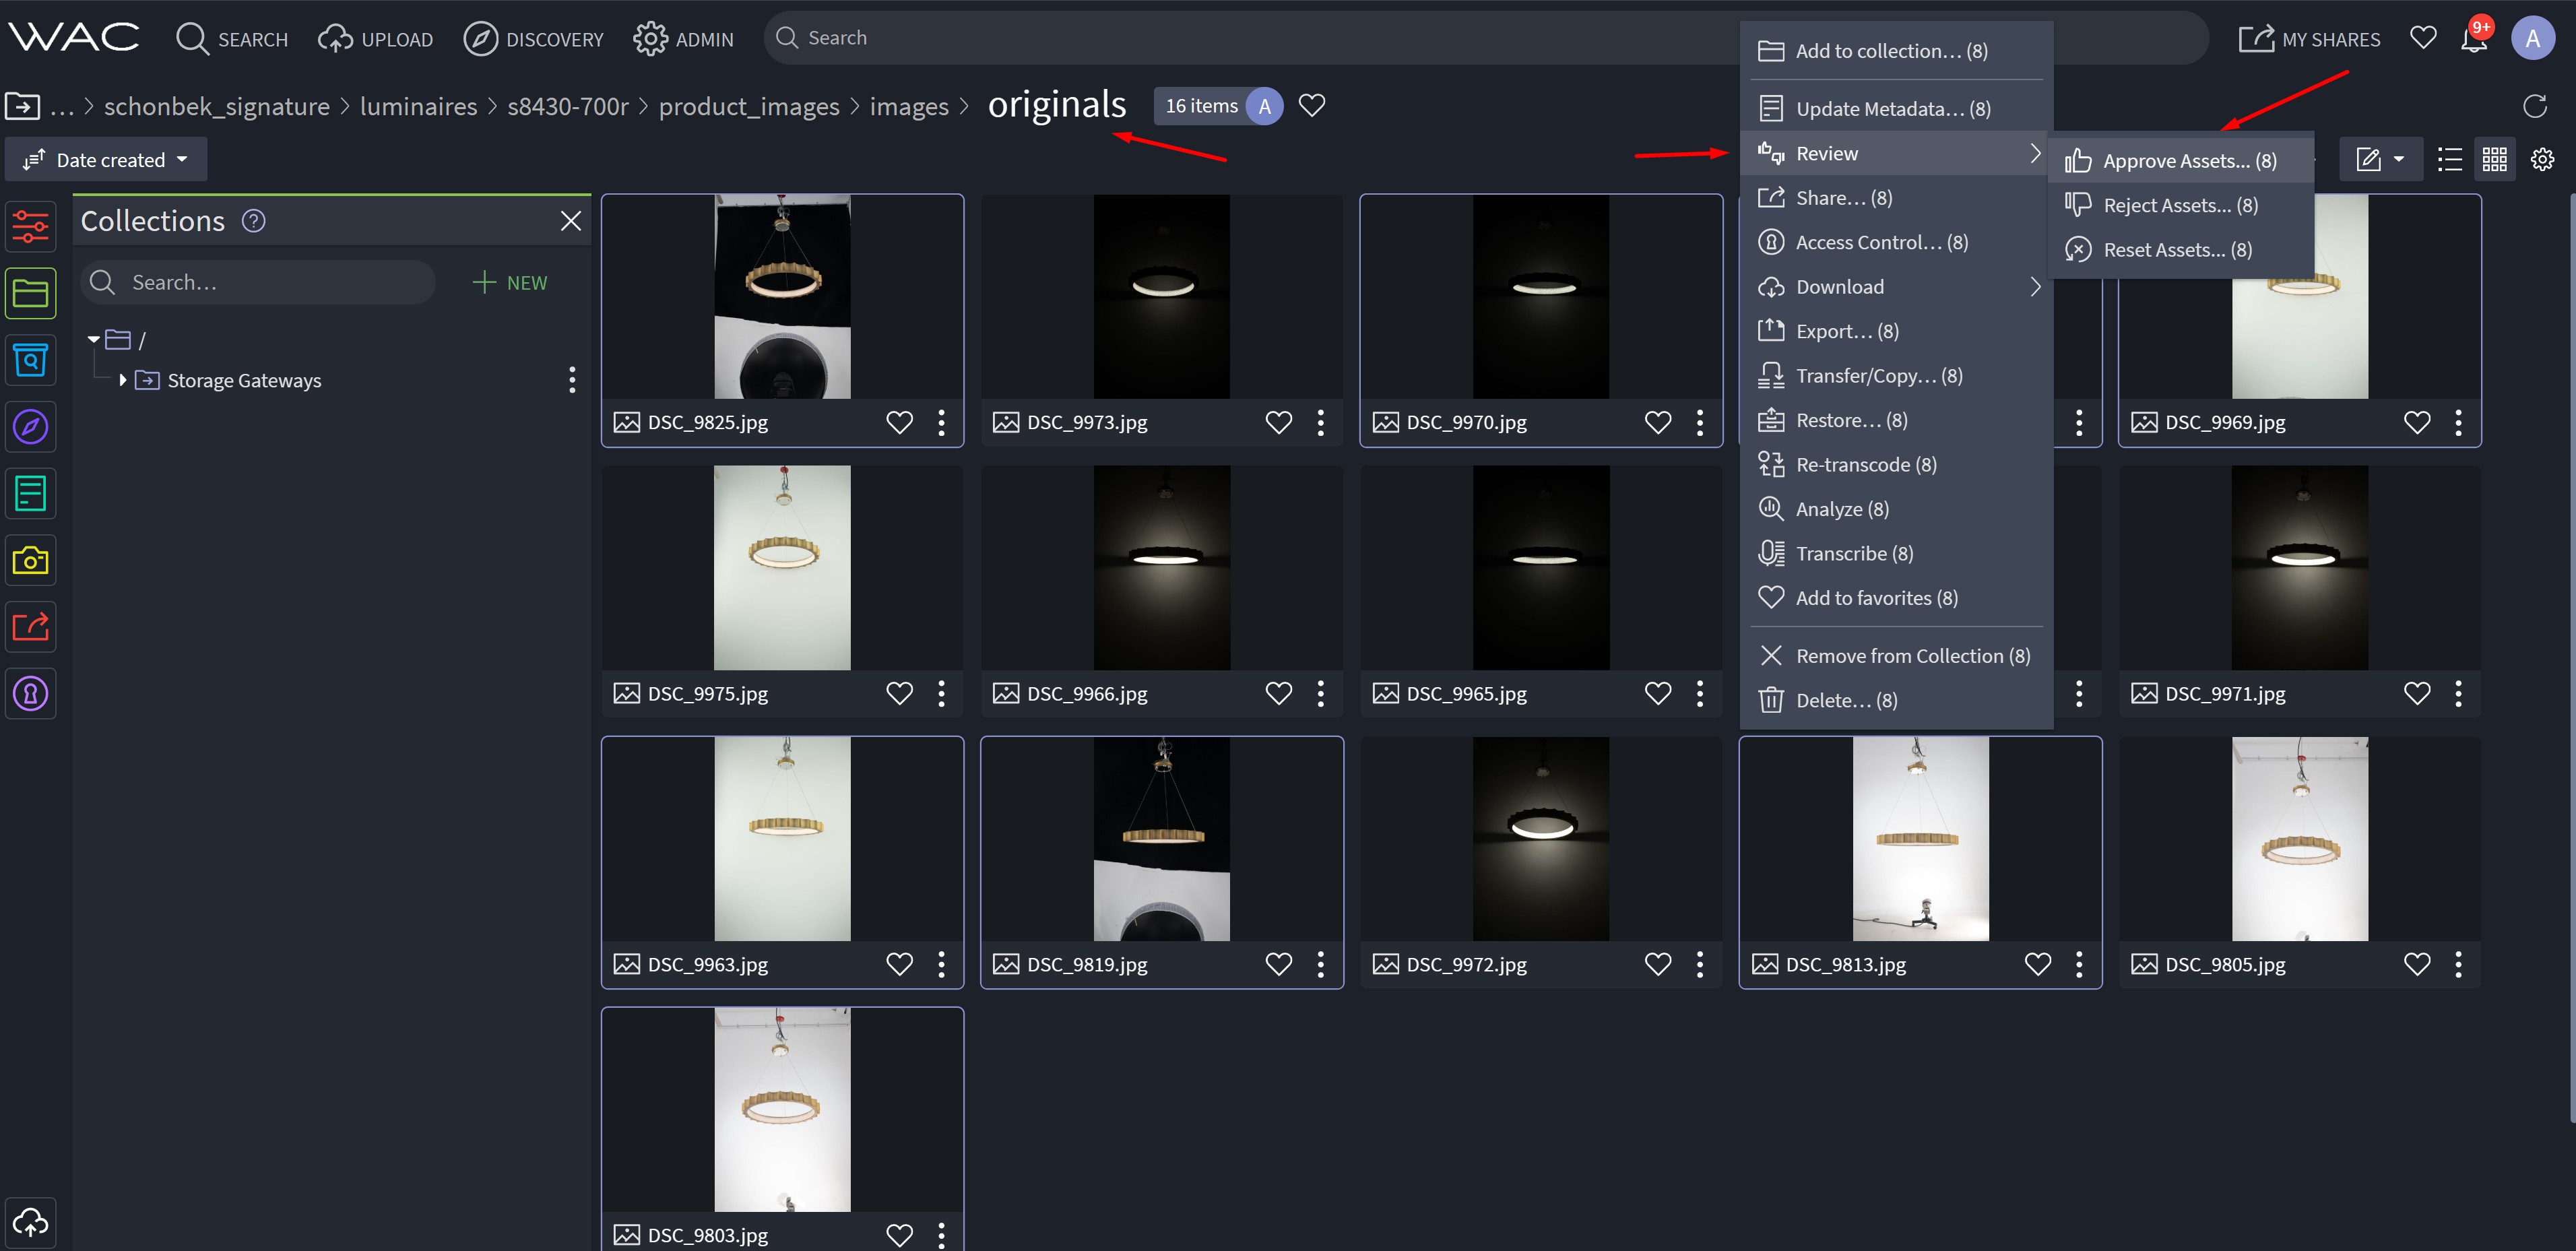
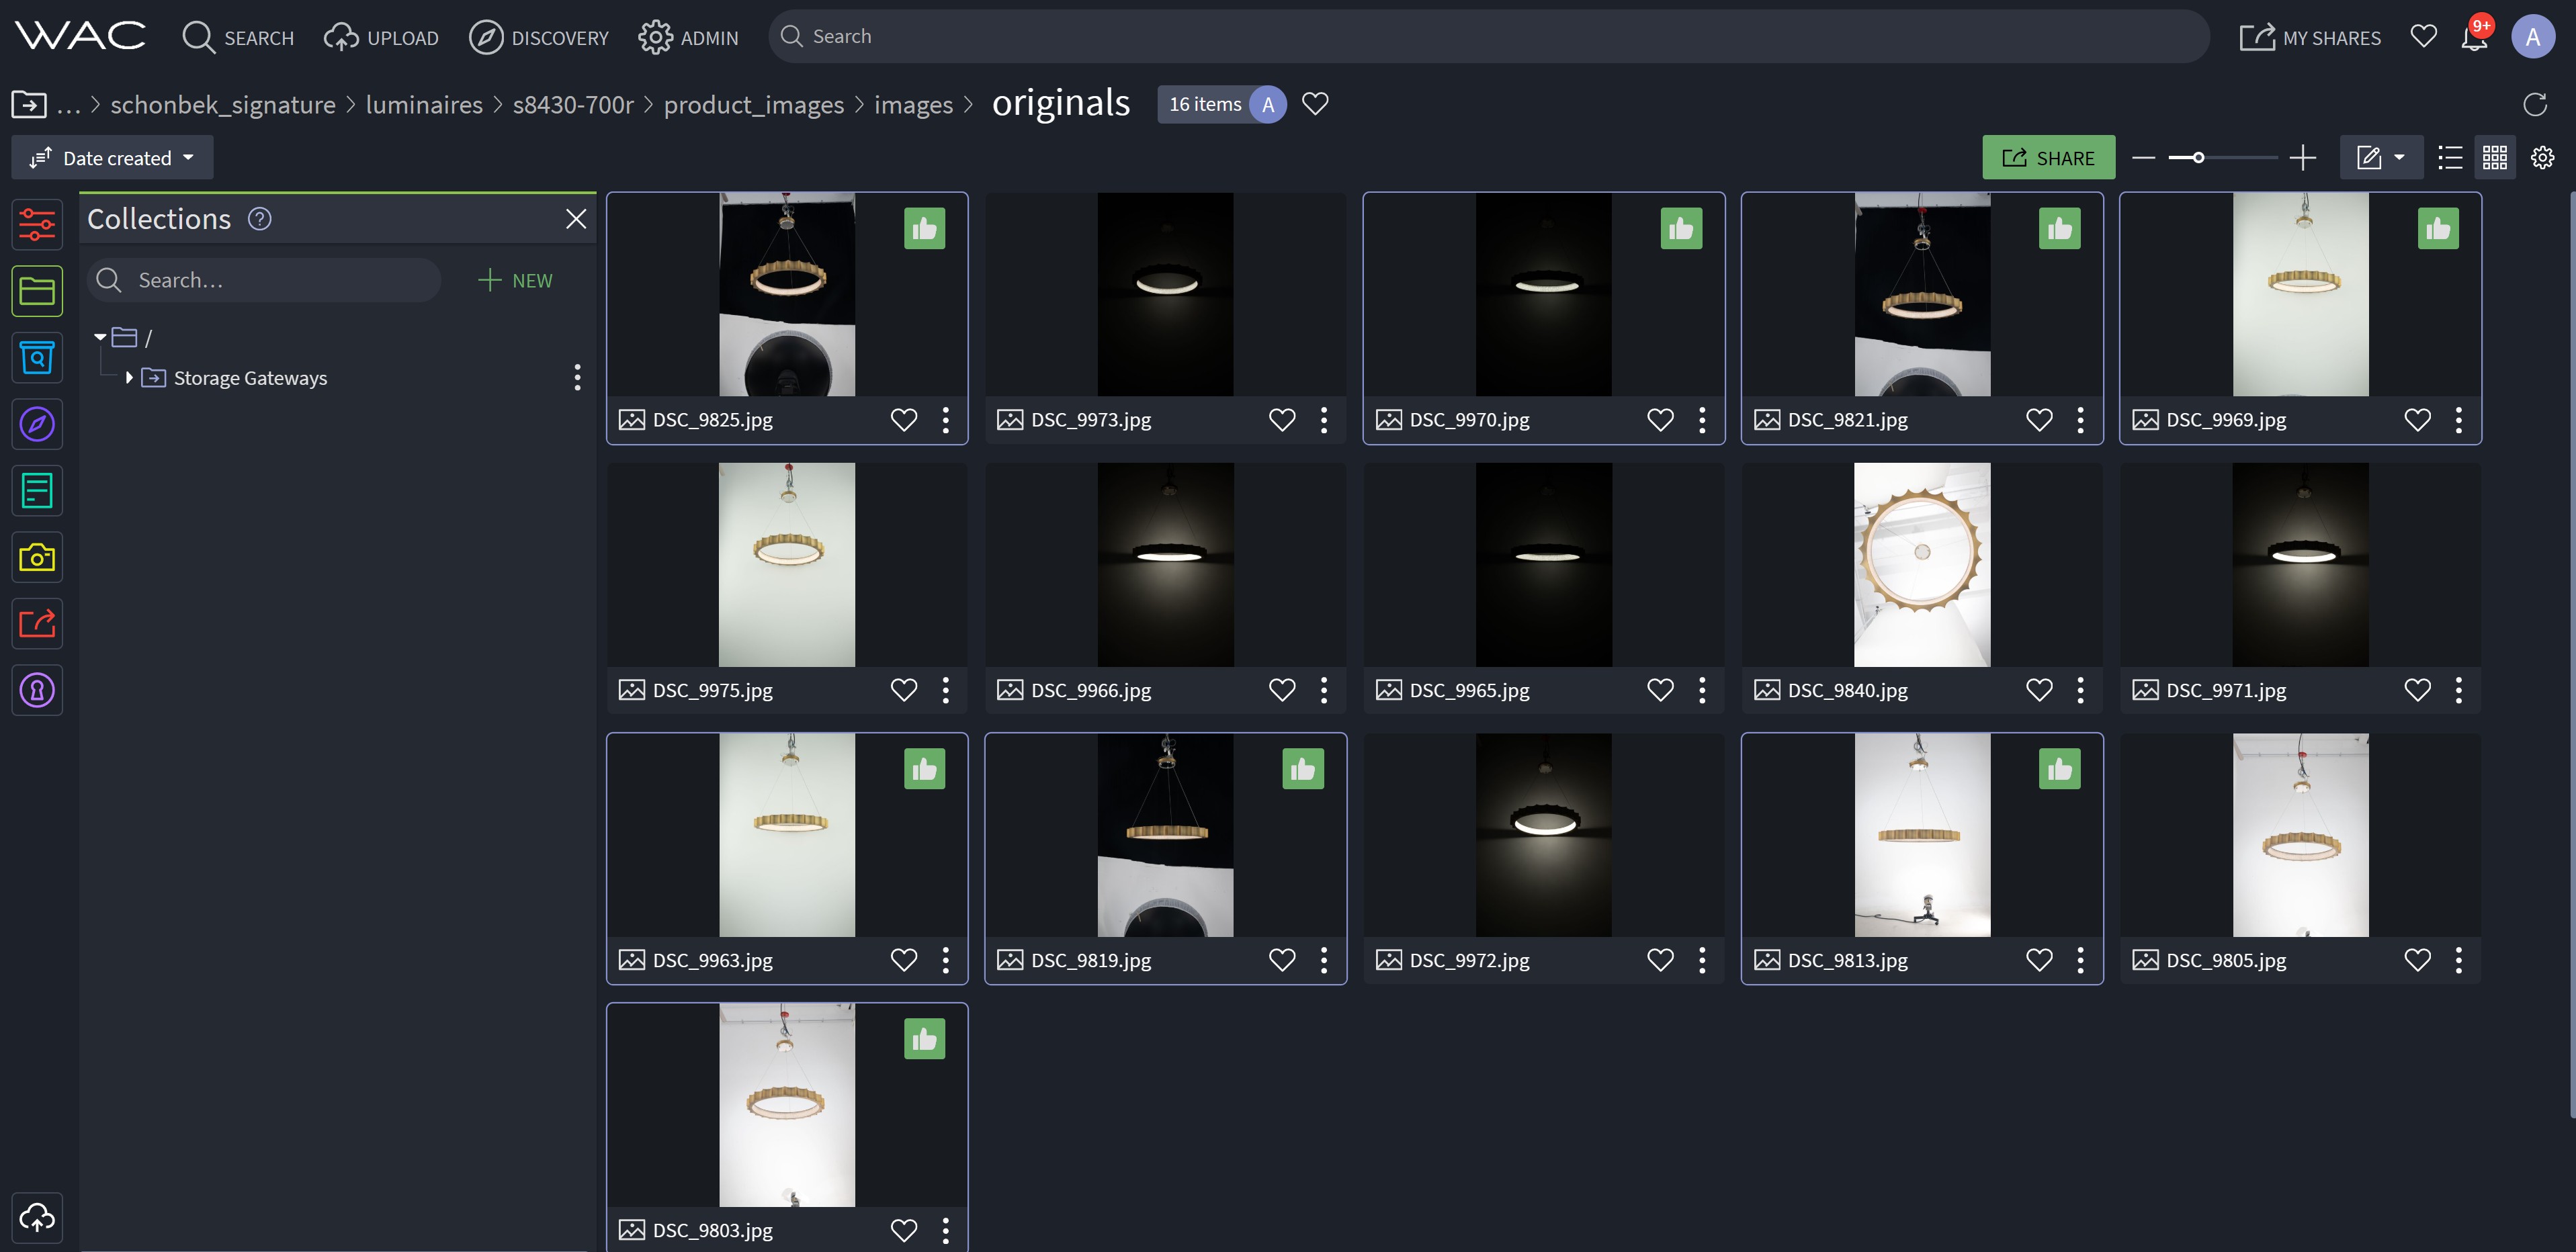
Select the angles to use. The PM decides which angles/shots will be edited and post-processed by Jude Li and team. Approve only the chosen angles by giving each a green thumbs up in Iconik.
-
Rejection is optional. The PM may
Reject(red thumbs down) any shots not approved, but it is not required. Default position: any image notApprovedis considered rejected - this minimizes the number of decisions PMs must make. -
Flip the Monday status. If enough images are deemed suitable, update the
photography_originalssubitem status on Monday toApproved. This tells Jude and team to edit only the selected angles and prepare them for the next step.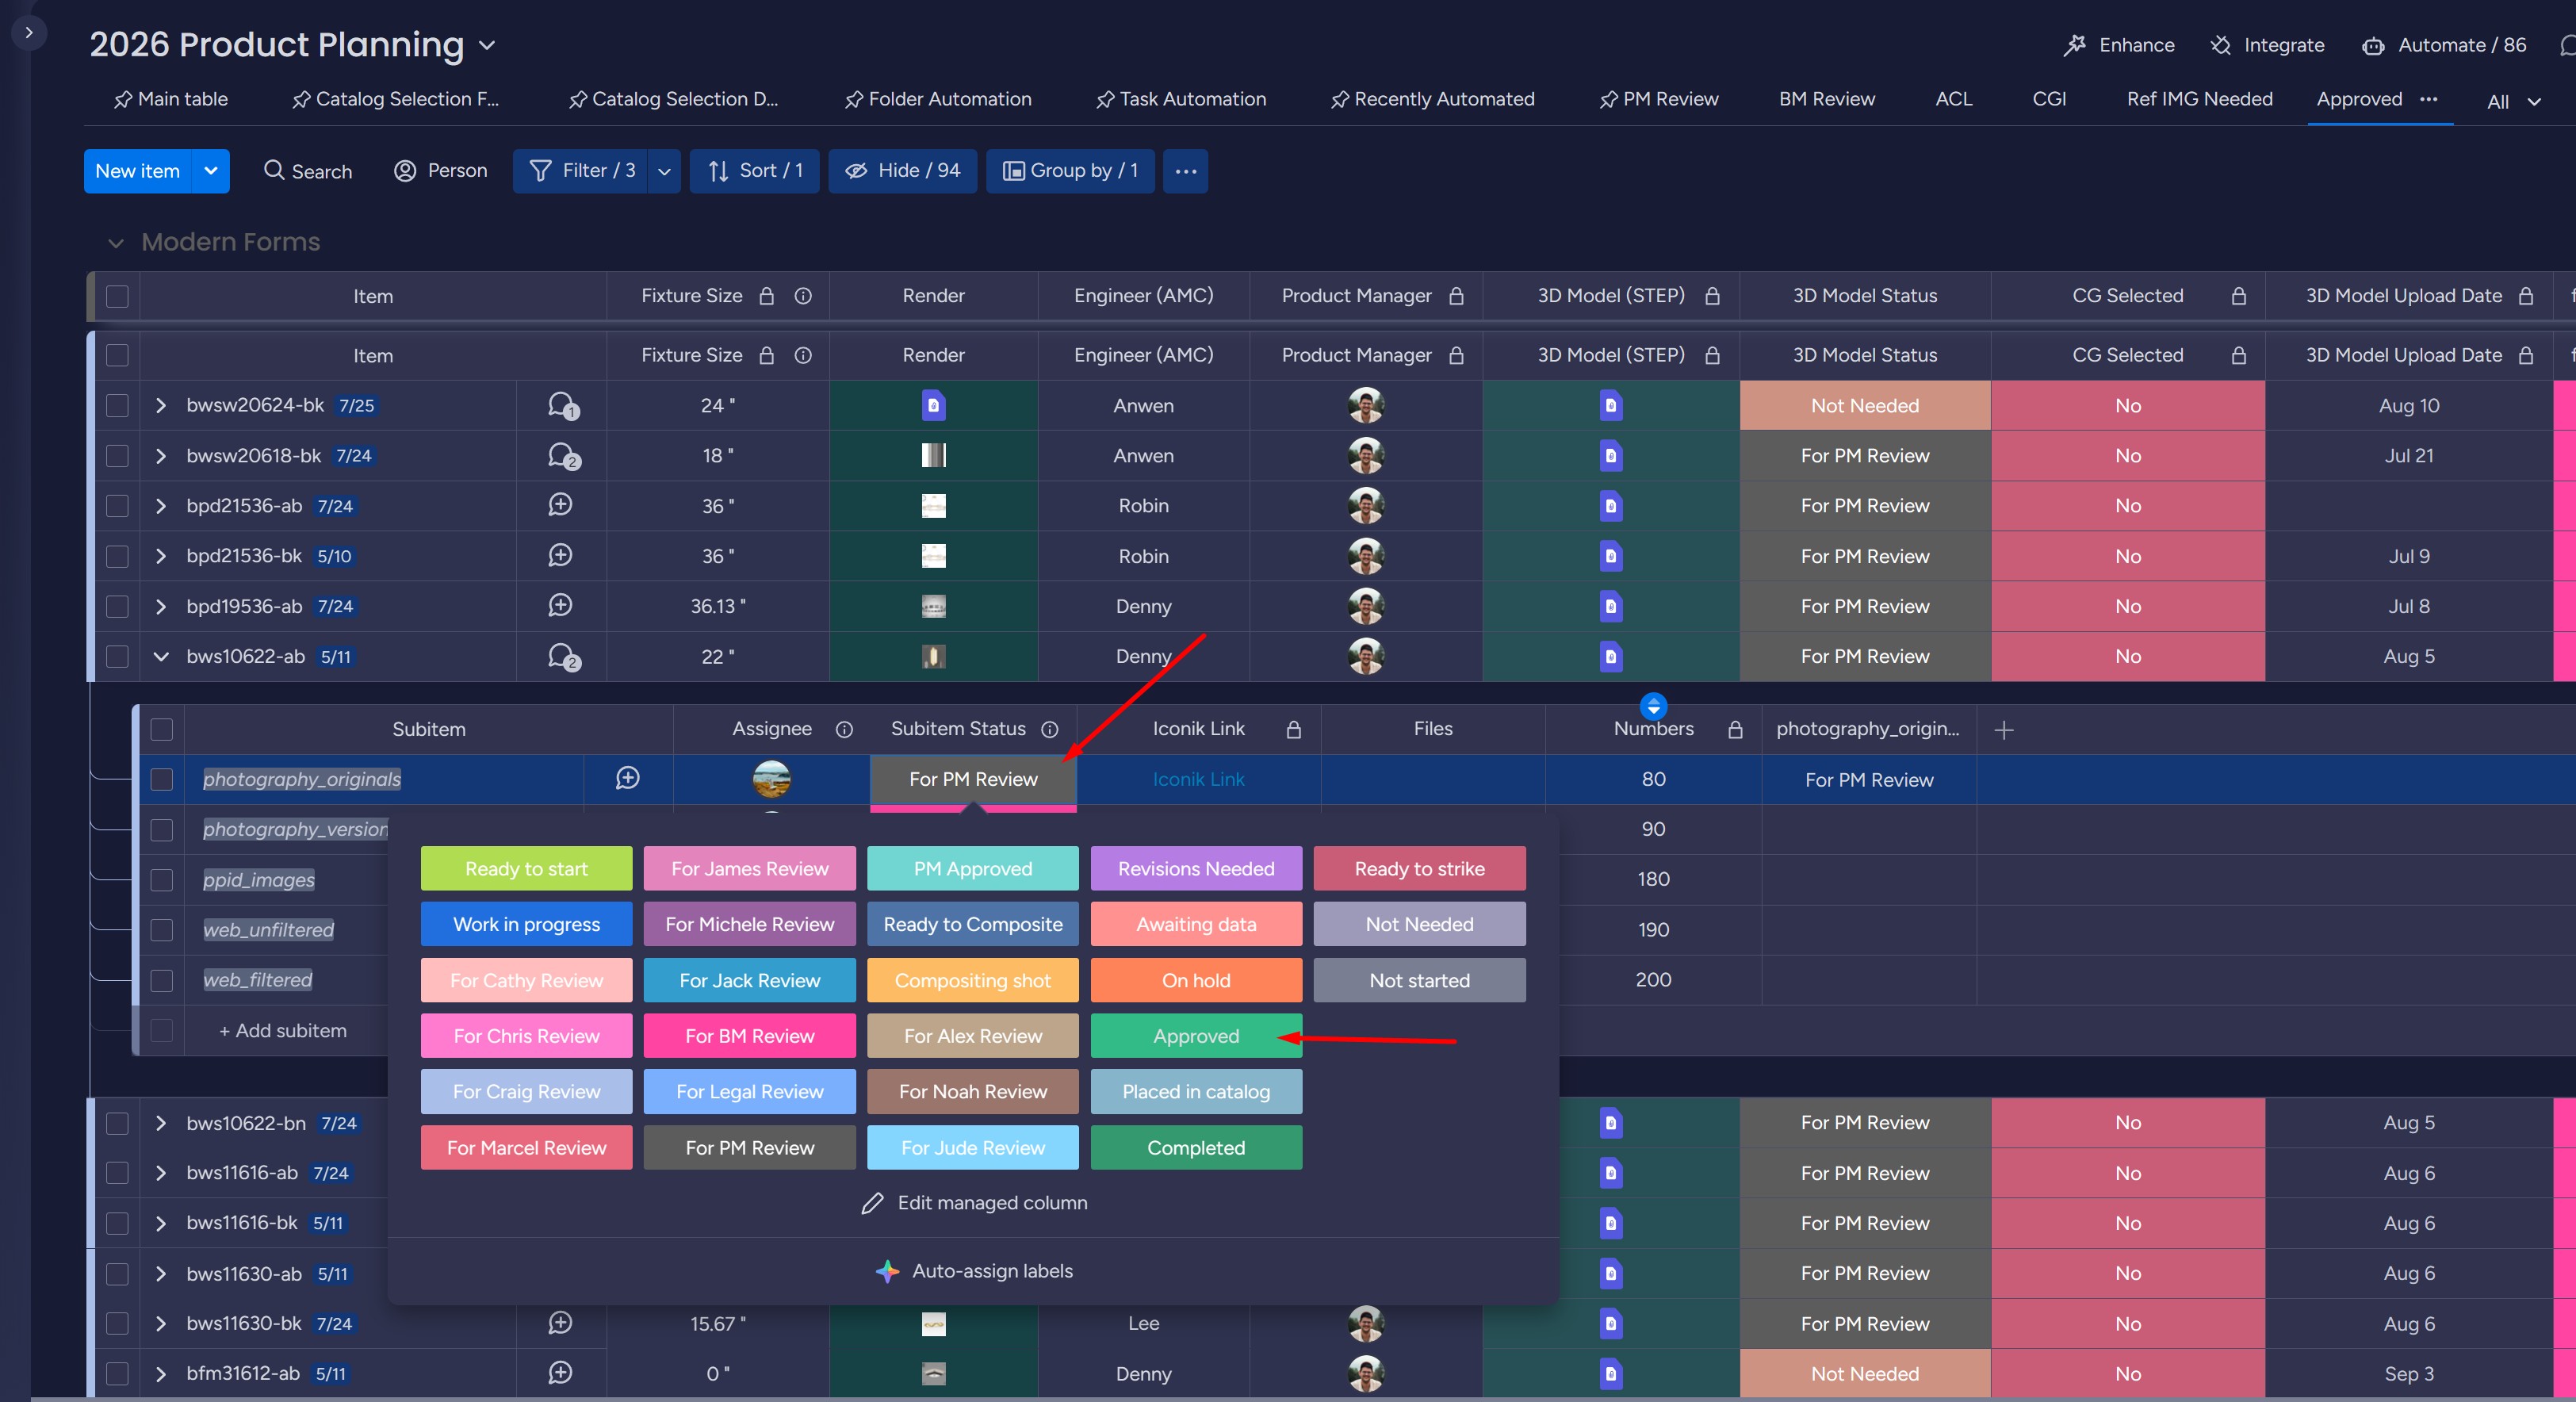
Stage 2 - photography_versions (PM review + PPID angle selection)
Section titled “Stage 2 - photography_versions (PM review + PPID angle selection)”photography_versions are the edited images post-processed by Jude Li and team at
AMC, based on the PM selection made in Stage 1. This stage runs a Brand Manager →
Product Manager chain: the Brand Manager clears brand compliance first, then the PM
selects PPID angles. Each reviewer just sets Approved and the board advances.
-
Brand Manager clears compliance first. The board enters the task at the Brand Manager’s stage; the BM checks brand compliance and sets
Approved, which advances the task to the PM. (If no Brand Manager is assigned, the board skips straight to the PM.) -
Review the edited images. The PM reviews the post-processed images until satisfied. Any revisions requested should be annotated directly on each image in Iconik until results are satisfactory.
-
Select PPID angles. At this stage the PM is only responsible for selecting which image angles should move forward as PPID candidates. Make the selection in Iconik using the
Approvefunction (green thumbs up). This indicates which angles should be edited and carried forward - it is not final website tagging.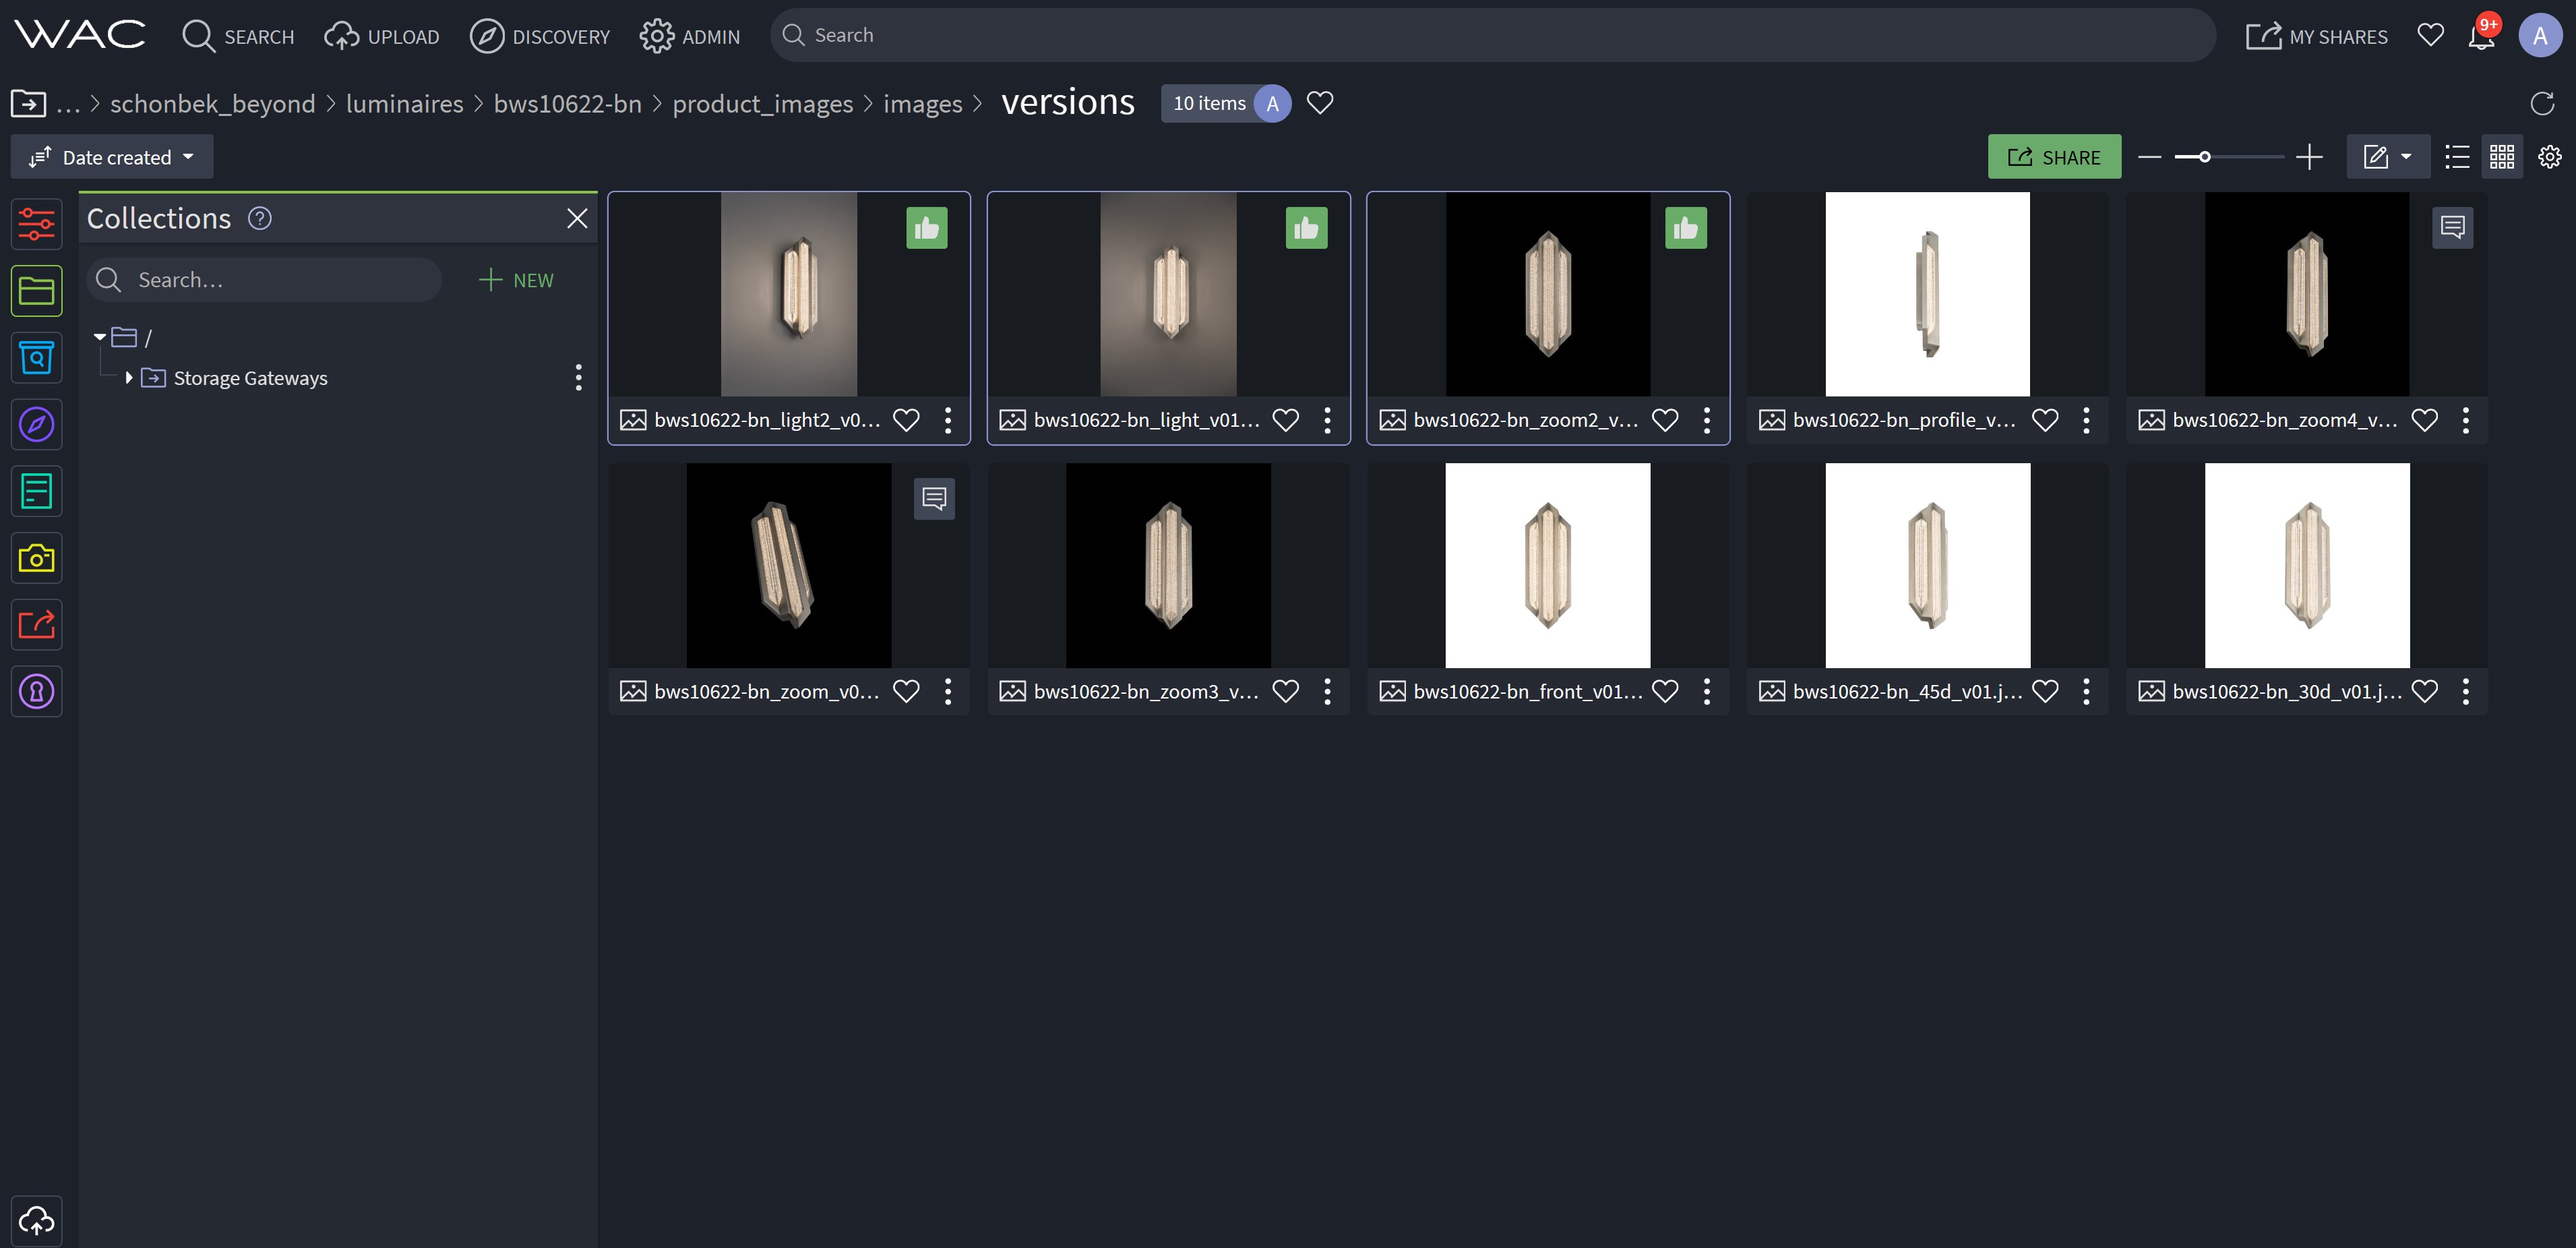
-
Approve the subitem. Once all edited images meet standard requirements and angle selections are complete, set the
photography_versionssubitem toApproved. This is the final approval in the chain, so the board carries the SKU forward; Jude and team then edit only the approved angles, avoiding unnecessary work on unused shots.
What happens next
Section titled “What happens next”Only images with a green thumbs up in photography_versions (or renders) are
eligible to enter the ppid_images stage. From there they are prepped, named, and
published - see PPID & web export and the
full Iconik Review Process.
Troubleshooting
Section titled “Troubleshooting”- All originals rejected / reshoot required - set the
photography_originalsstatus toRevisions Neededand move the raws into/originals/_rejected. See the exception callout above. - Image versioning not tracking in Iconik - duplicates break Iconik’s automatic versioning. Never copy-paste files within the working filespace; see the automation ecosystem and folder structures.