
Tasty Publisher setup
Tasty Publisher is the Blender add-on that handles save / version / render-path / publish for the CG pipeline. For day-to-day usage see Blender + Tasty Publisher.
Install
Section titled “Install”Download → Install → Enable.
- Download the Tasty Publisher add-on zip from the shared drive (link in the onboarding materials). Save it somewhere memorable and do not unzip it - Blender installs add-ons from the zip directly.
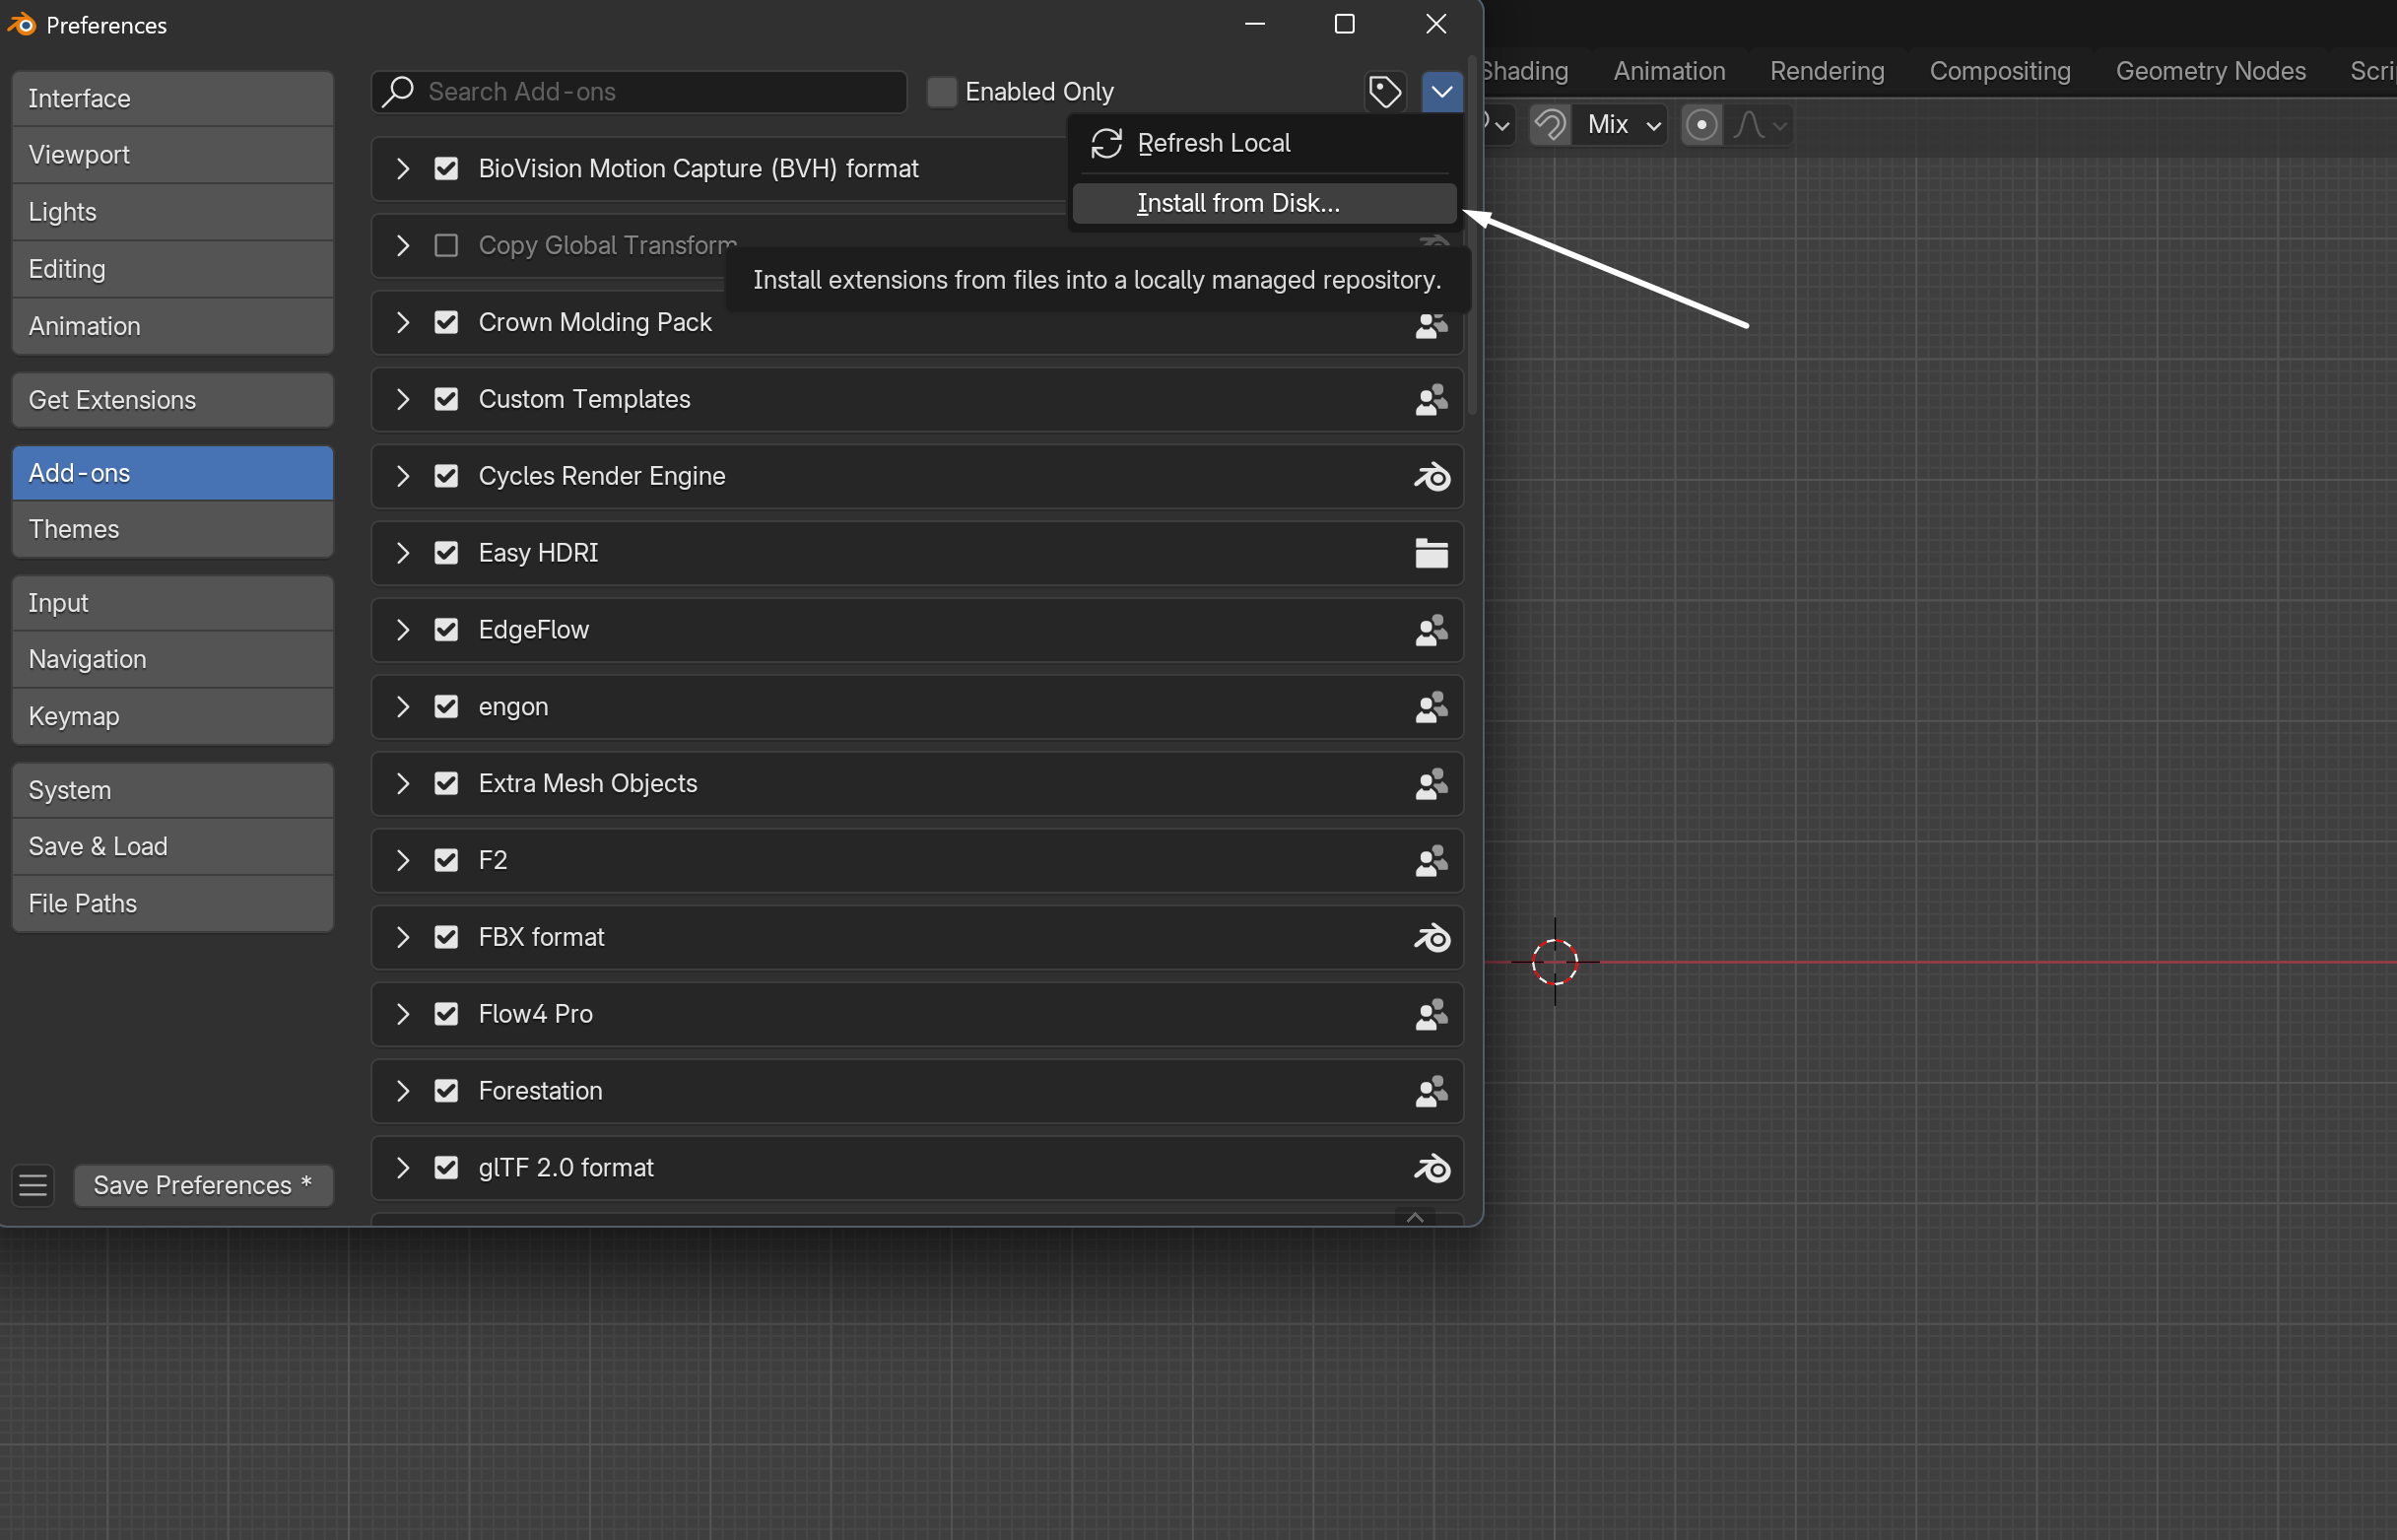
- Open Blender and go to Edit → Preferences → Add-ons.
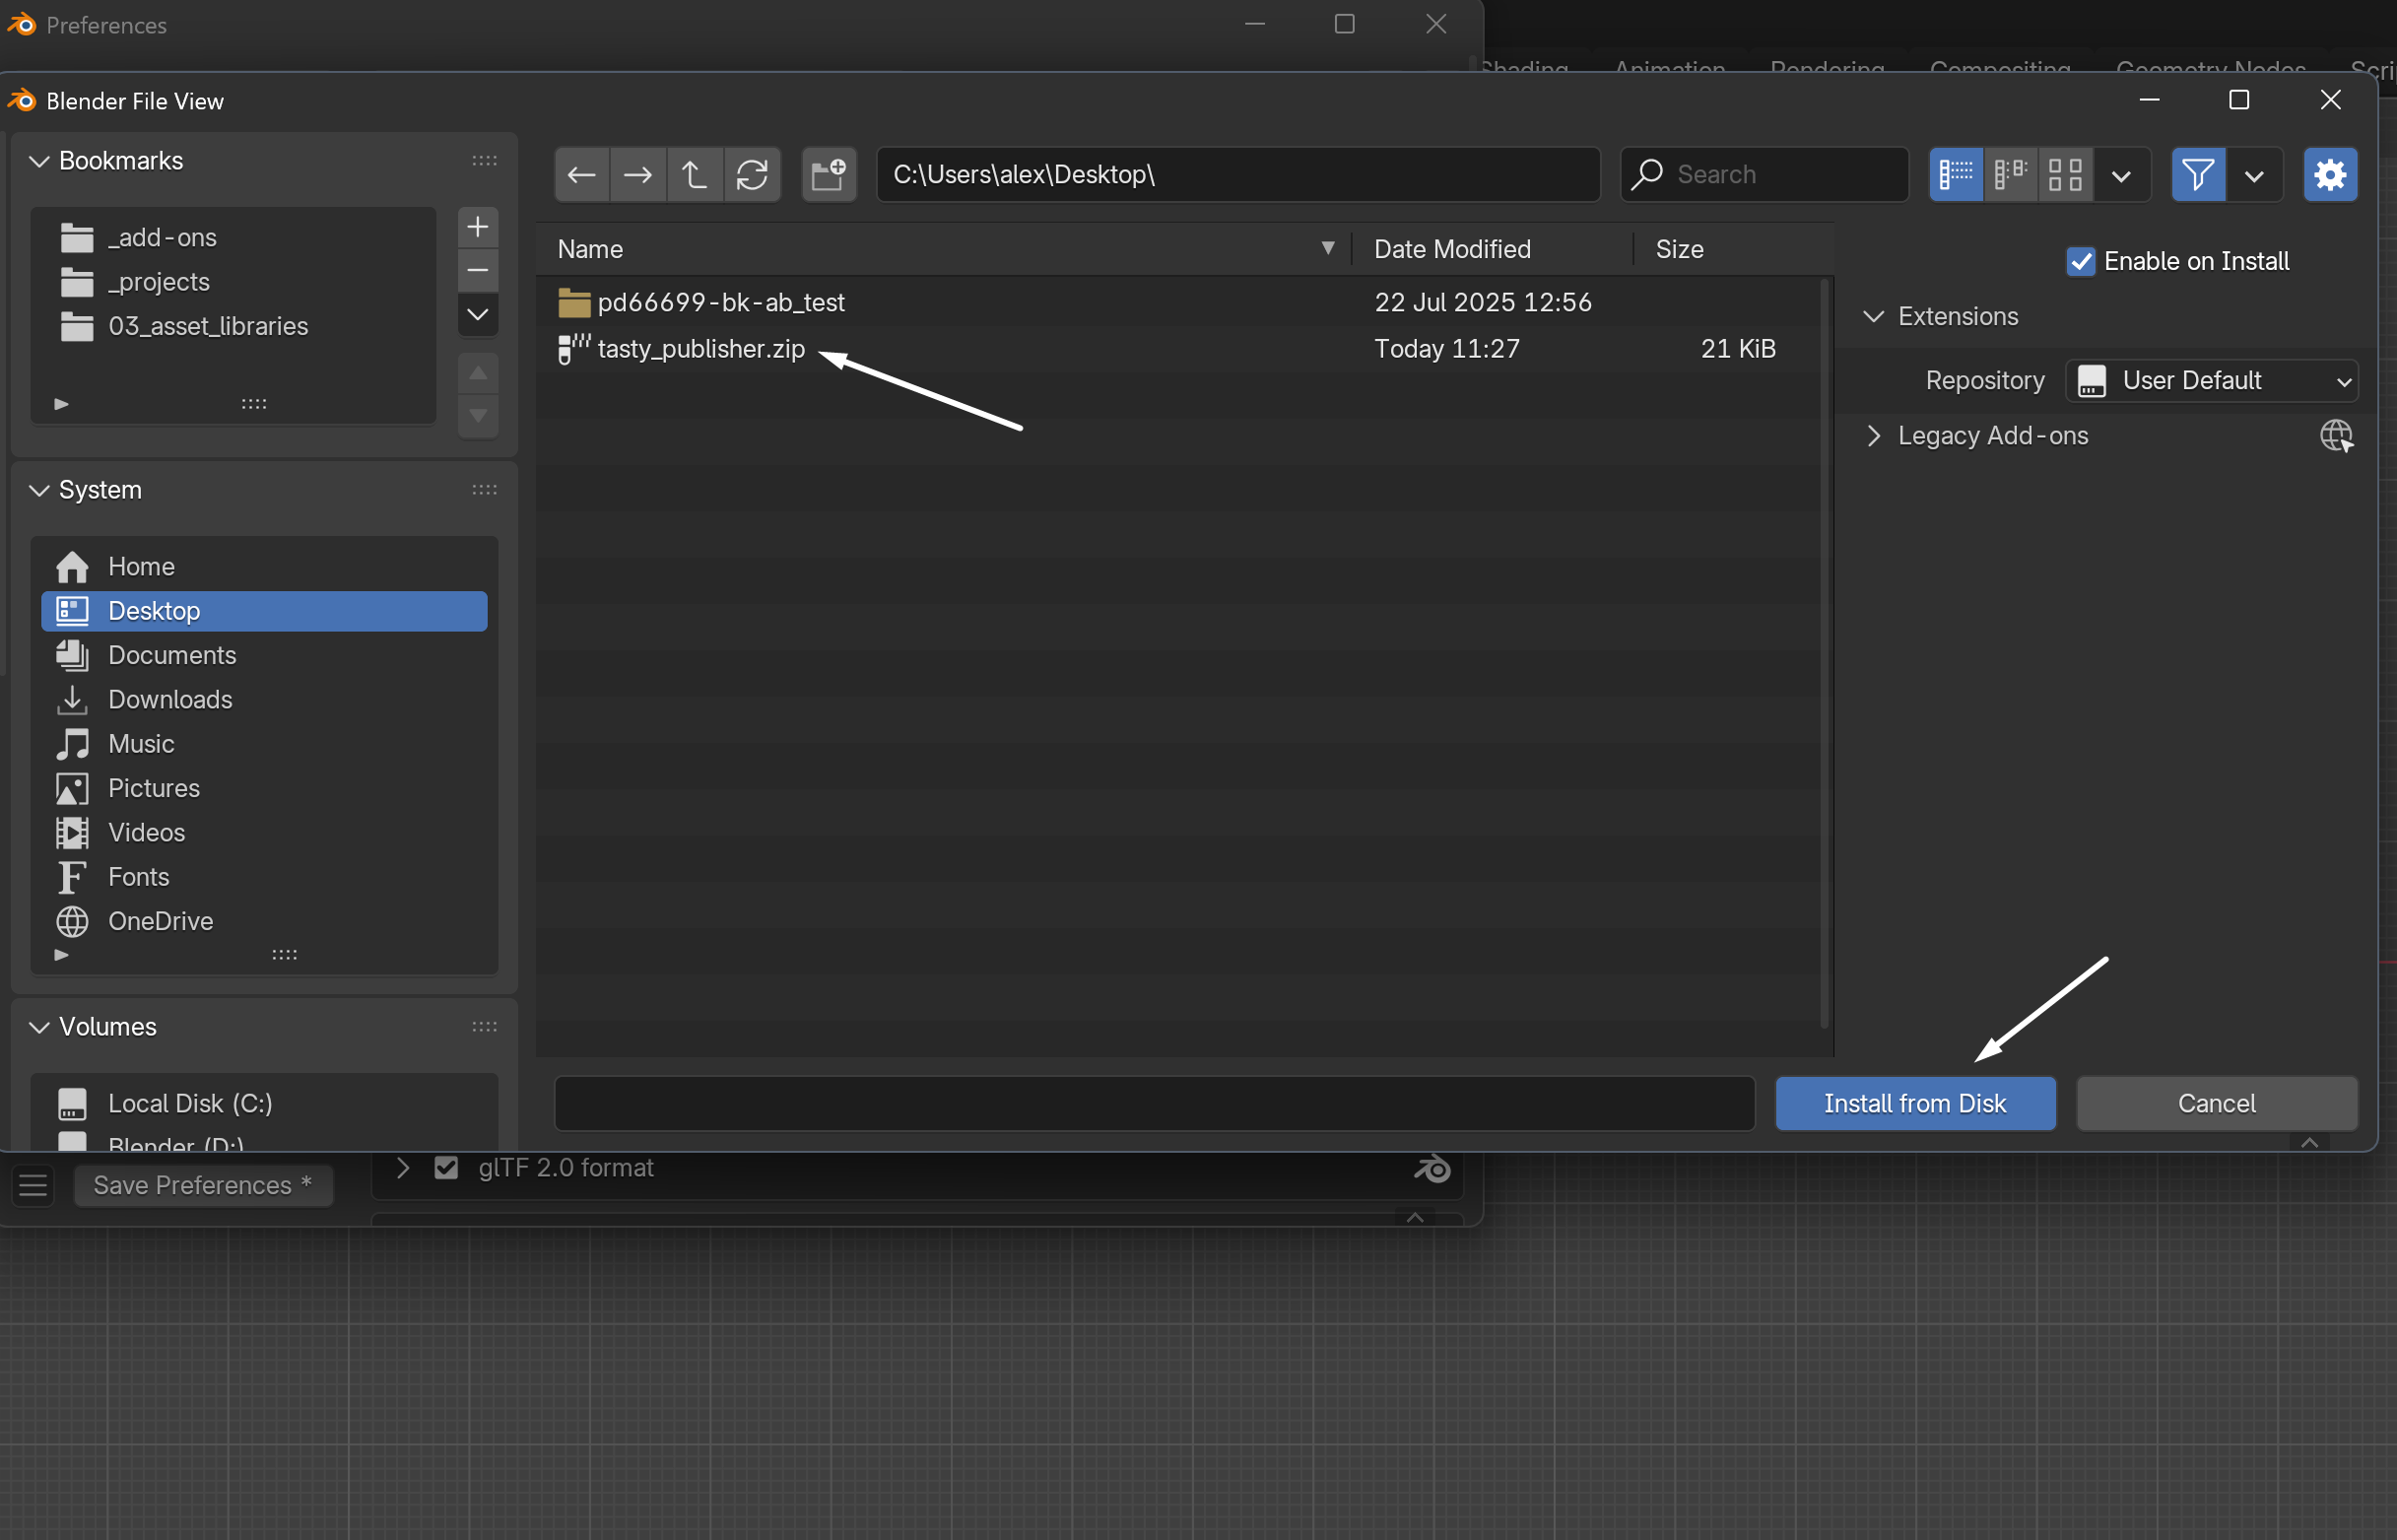
- Click Install (top right) and navigate to the downloaded zip.
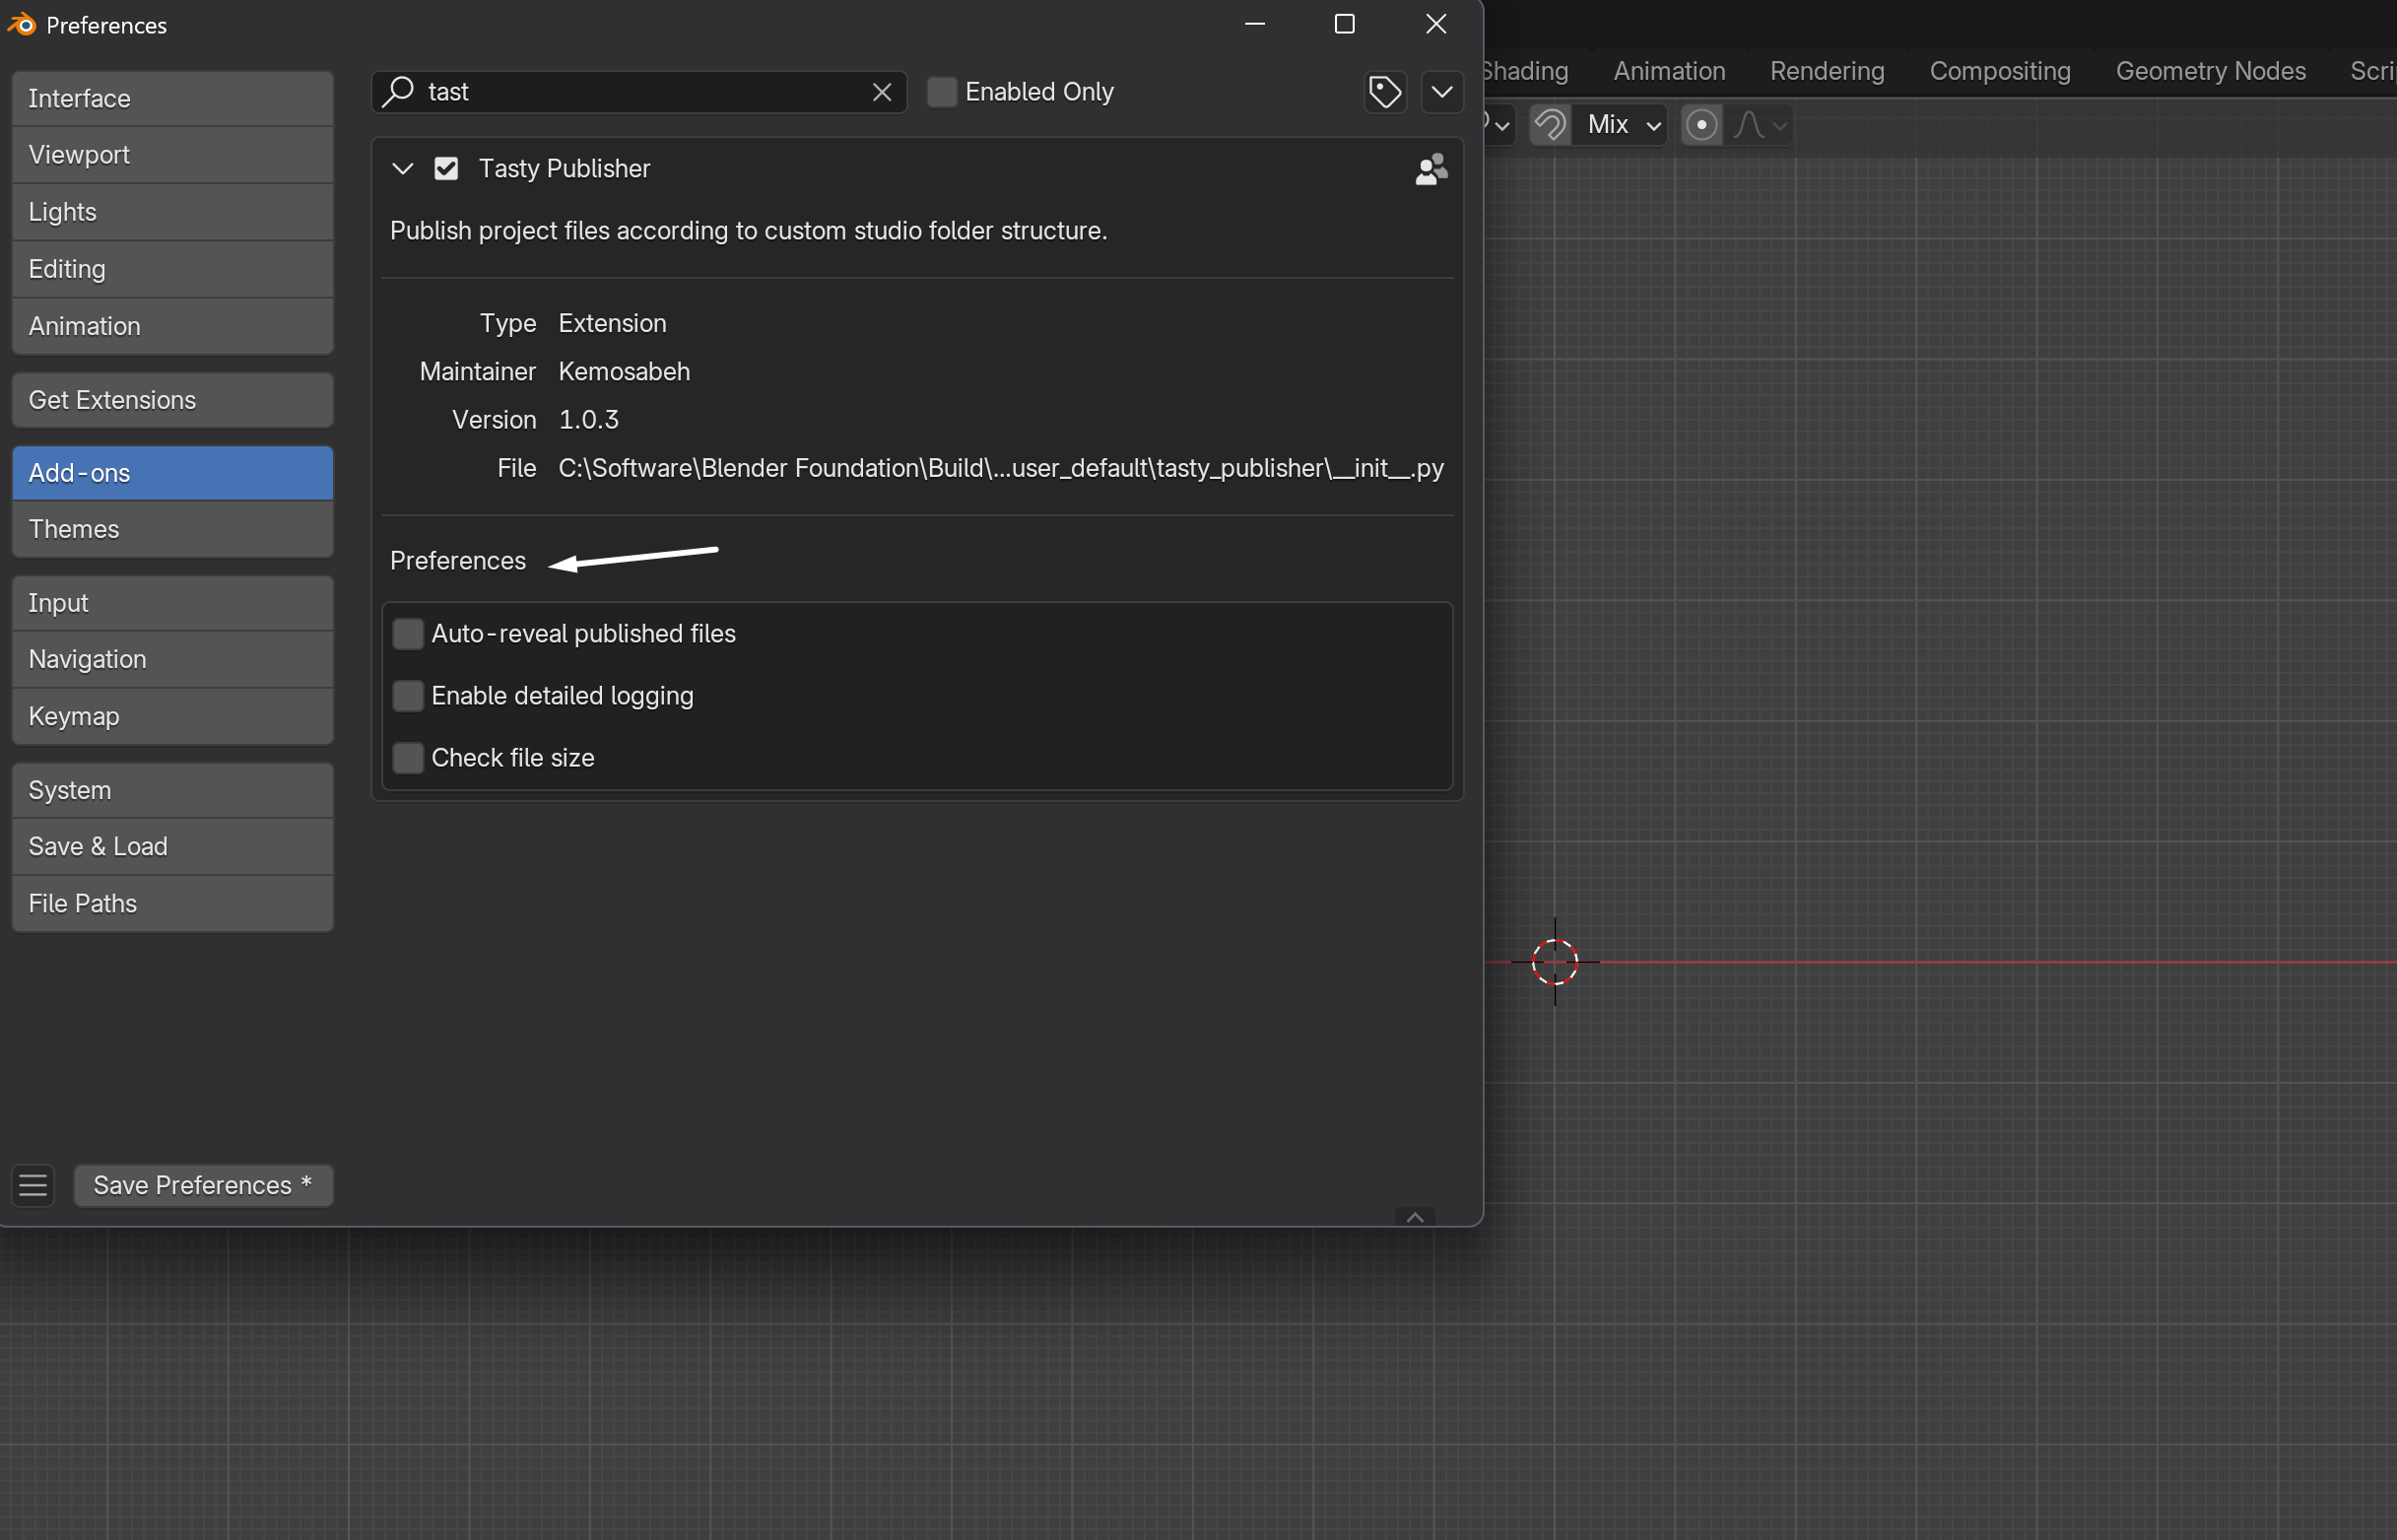
- Select the file and click Install Add-on, then enable it with the checkbox.
Configure
Section titled “Configure”Open Edit → Preferences → Add-ons → Tasty Publisher to set the post-install options:
- Auto-reveal files - opens the file browser after publishing.
- File size warnings - alerts for files over 100MB.
- Debug logging - for troubleshooting.
Confirm the add-on resolves paths against the CG folder structure
(00_in / 01_working / 02_renders / 03_out) - see
Folder structures. CG projects live on LucidLink at
Volumes/video-working/team/amc/cgi/_projects/[year]/....
Verify
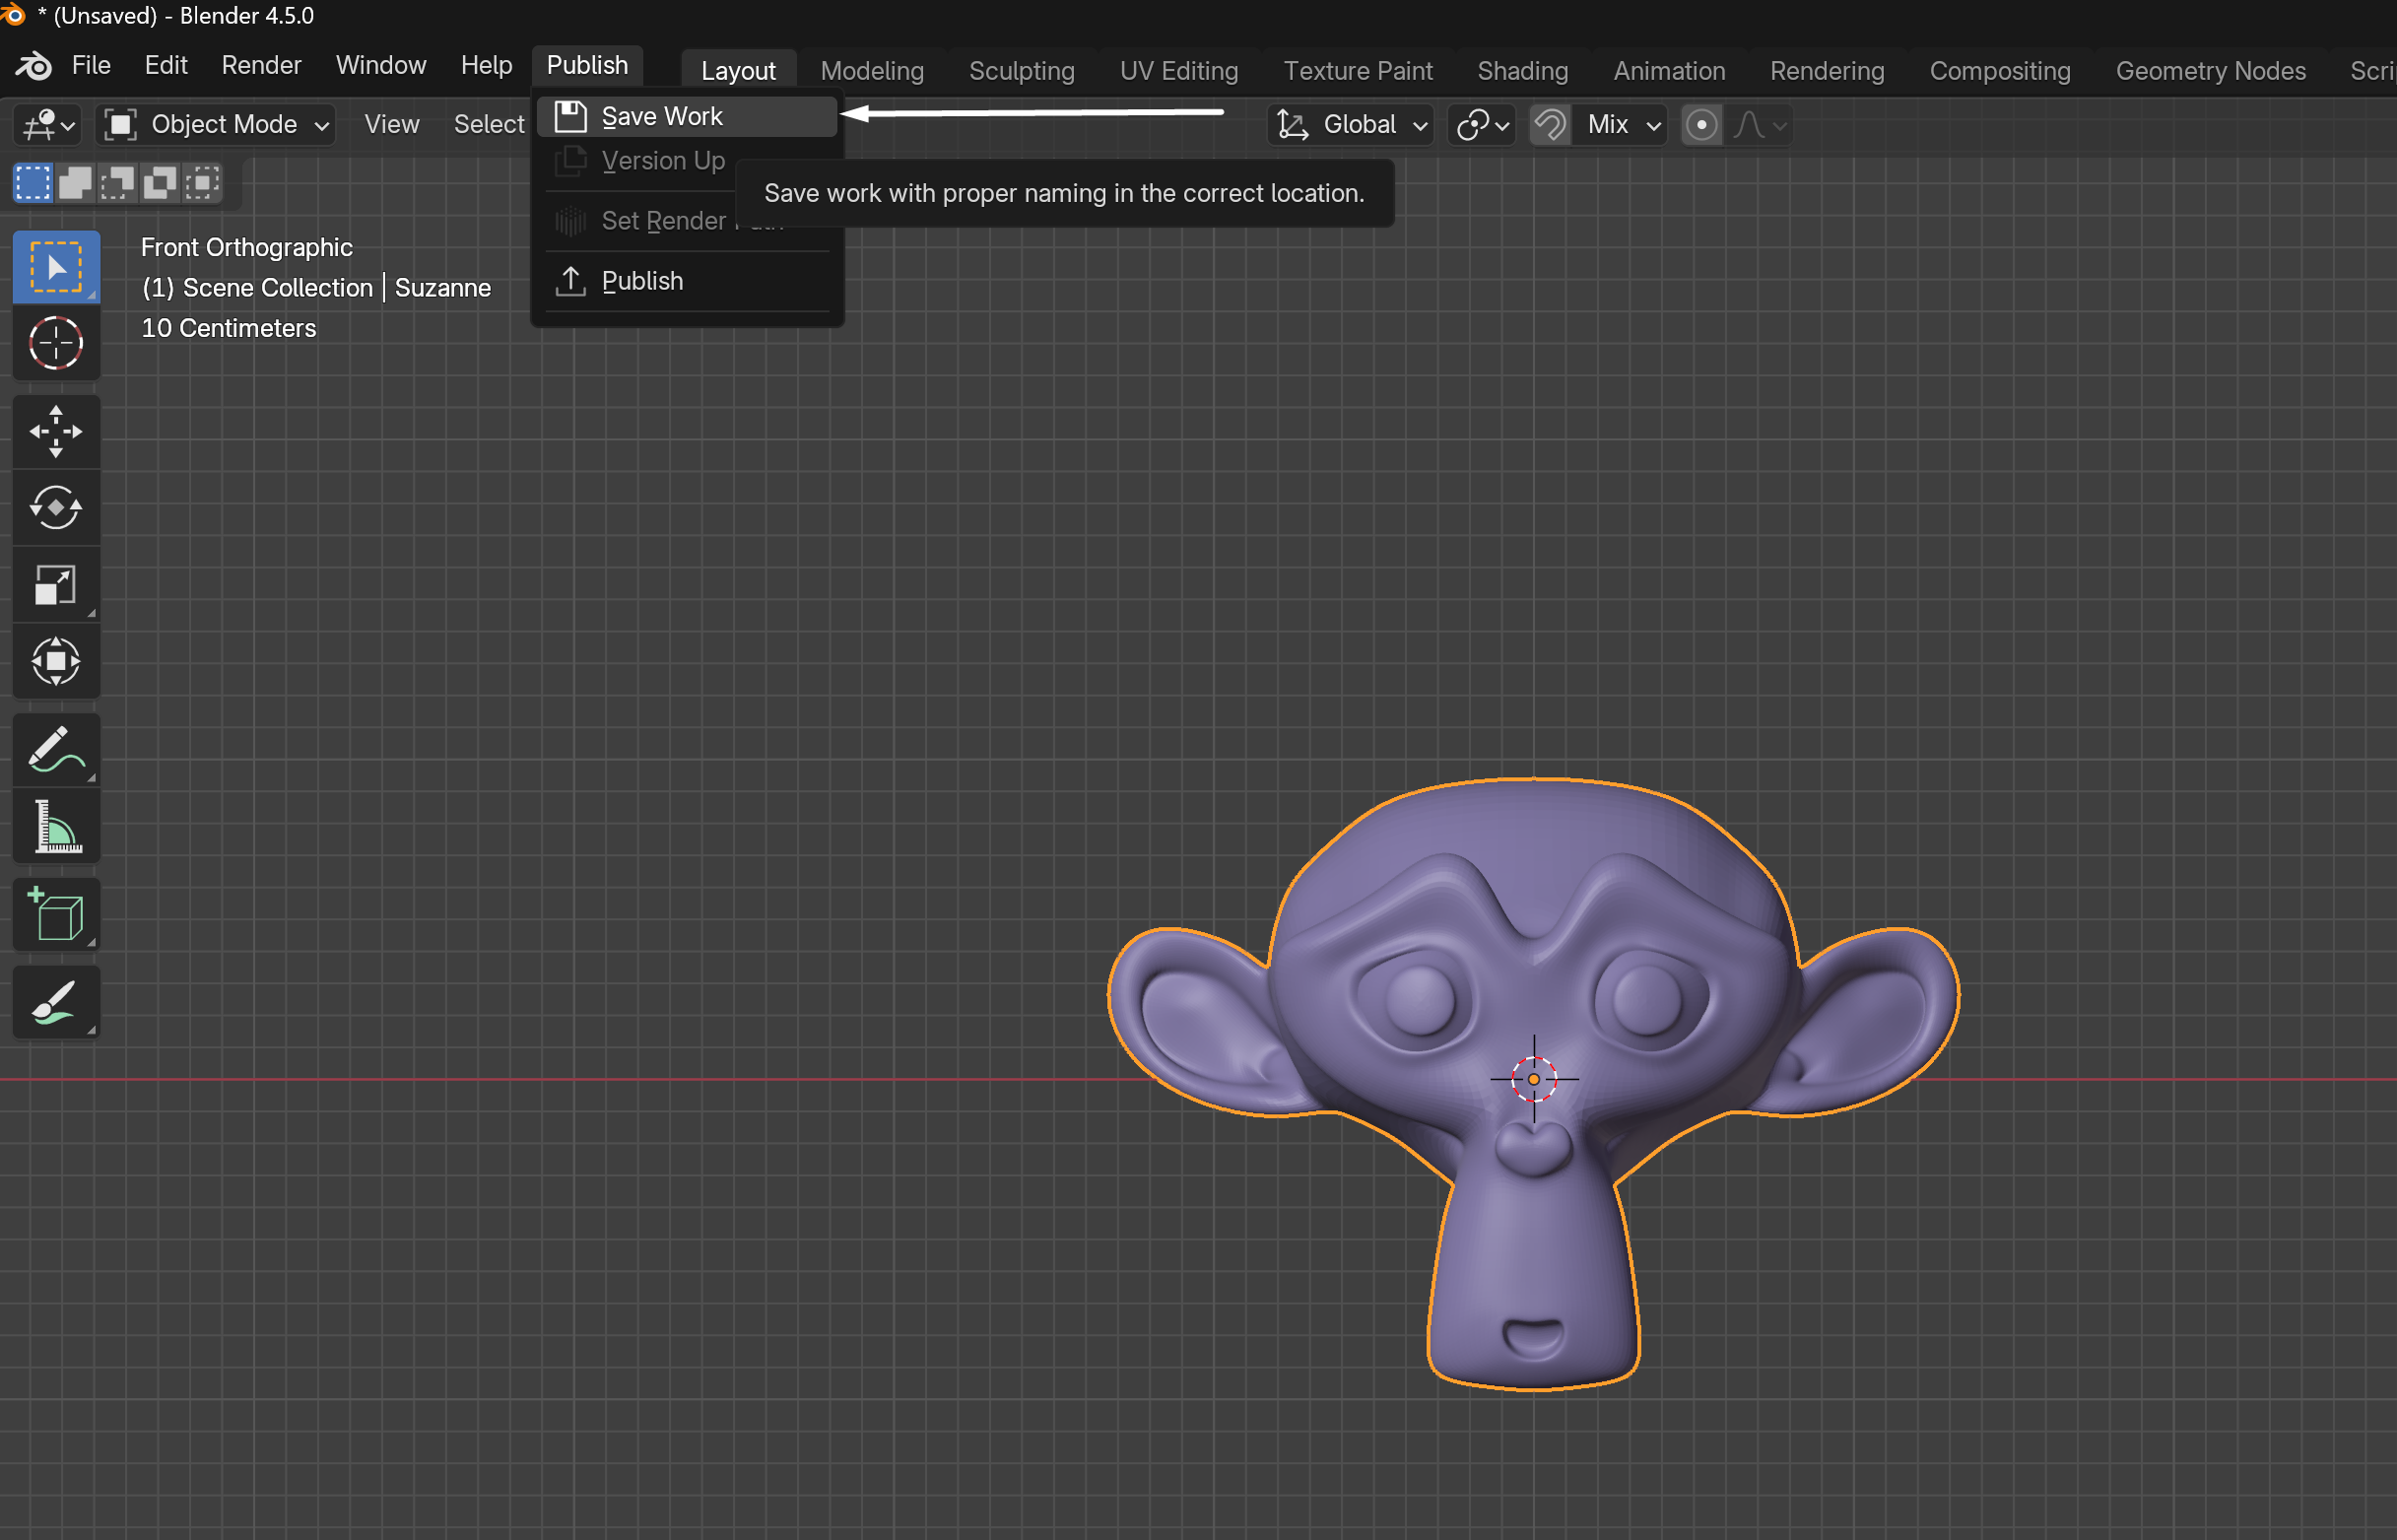
Section titled “Verify”After enabling, check that a Publish menu appears in the Blender topbar. On a test scene, run Save Work → Set Render Path → Publish and confirm:
- the file saves into the correct task folder with a pipeline-correct name,
- Set Render Path creates the output folder and shows the confirmation popup,
- Publish creates a
_publish/folder with a_pubcopy.